 mobyx
Documentation / Your targets
Device Manager
#Before you connect
Your Android device needs Developer Options and USB Debugging turned on -- a one-time setup per device:
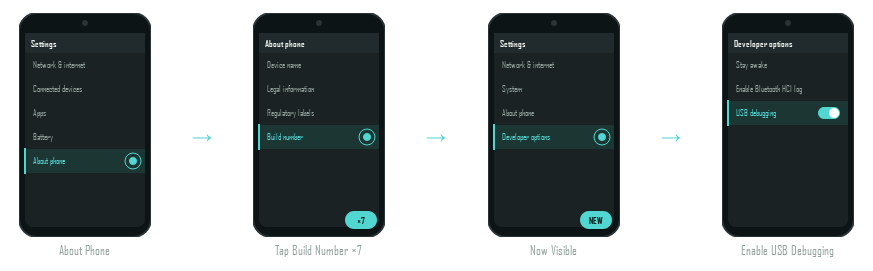
Exact menu names vary slightly by manufacturer (Samsung, Xiaomi, etc.), but the path is always the same: About Phone → tap Build Number 7 times → Developer Options → USB Debugging.
#USB Connection

#Wi-Fi Connection
Two ways to go wireless, both under the Device Manager toolbar's Wi-Fi Connection button:
Path A -- from an already-connected USB device

Path B -- manual IP entry

Once connected, a swap icon in the device's Connection column flips that device between USB and Wi-Fi any time with one click.
#Reading the device table
Every column in the Device Manager table, and what it tells you:
- UID
- A short app-assigned ID (D001, D002, ...) that sticks to a physical device permanently, even across reconnects.
- Device / Manufacturer / Chipset
- The phone's model name, maker, and SoC, read directly from the device.
- Android
- The device's Android OS version.
- Resolution
- Screen resolution in pixels -- what coordinates in Touch/Smart nodes are relative to.
- RAM
- Total device memory.
- Battery
- Current battery percentage.
- IP
- The device's current Wi-Fi IP address, when connected wirelessly.
- Status
- Whether the device is currently reachable.
- Connection
- USB / Wi-Fi / Virtual, plus a one-click swap icon to switch USB ↔ Wi-Fi.
- Action
- ⓘ Device Info · ▶ Open (start mirroring) · ⏹ Close.
#Mobyx Monitor
Opening one or more phones, Mobyx Devices or browsers launches the Mobyx Monitor: one window with two tabs, Phones (with Mobyx Devices) and Browsers. Show all puts every connected phone, every running Mobyx Device and every running browser in, and keeps up as they come and go.
Each screen has its own buttons down its right side: Back, Home, Recents, volume, power, rotate and a screenshot for a phone; Back, Forward, Reload, Open a link and a screenshot for a browser. The ⋯ under them has the rest (unlock, notifications, type text, open a link, record, reconnect the picture).
The Control panel on the right of the window does the same for many at once: it acts on the screens you tick, or on all of them when none is ticked -- so one click presses Home on twenty phones. It also installs APKs, sends and fetches files, takes screenshots and changes the phones' settings. Fold it away with › when the screens need the room.
Selecting: tick a screen (or click its name bar), Ctrl+A for all, Esc for none, or Select all, None and Invert in the status bar. Focus (the square button) shows just that one, large; Esc or Back to all returns. The ⋯ menu at the top orders the screens by name, connection, status or kind and turns Fill the width on or off. A phone that disconnects counts down 20 seconds and closes itself, and is picked up again if it returns.
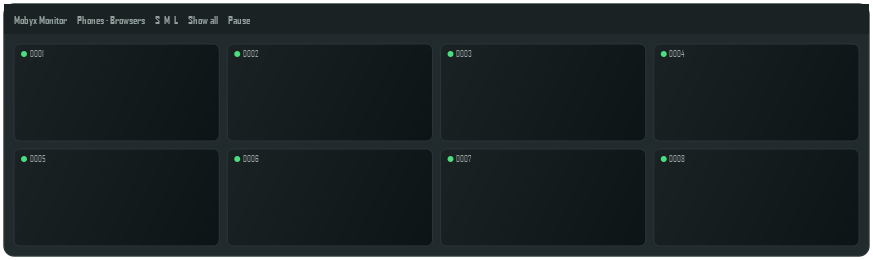
Resize the screens (S, M, L), pause the pictures to save the computer's effort when you are not watching, and drop APK files on the window to install them on the phones.